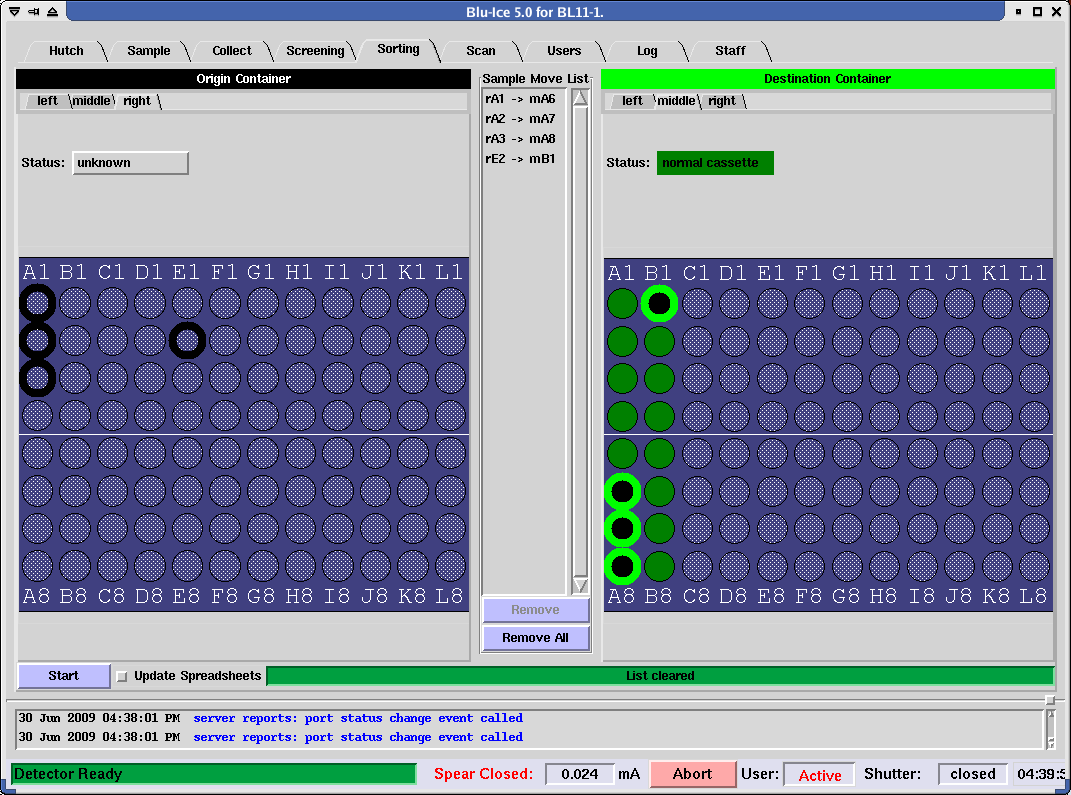
Sorting Tab


The Sorting tab shown in Fig. 1 provides an interface for selecting samples to automatically sort between cassettes and/or unipucks. Sorting can be useful, for example, after a screening experiment, to store good samples in a different container in preparation for a future data collection experiment, or for separating fresh samples from crystals exposed during the experiment. Policies for the use of this facility are documented in the Users' Guide.


[Fig 1] Sorting tab

The Sorting Tab interface displays an interactive map of an origin container (left panel) and a destination container (right panel) for selecting samples to move between the two containers (cassettes and/or unipucks). The origin and destination containers are selected by clicking on the Left, Middle and Right Tabs. The origin and destination container can also be the same container.

Samples are selected by clicking on the sample port. The left side of the GUI is used to select the samples to be moved (origin ports). The destination ports for the samples are selected on the right side of the GUI.

  • Origin ports containing a sample (green) or with unknown status (gray) can be selected. Selected origin ports will be surrounded with a black circle.
  • Destination ports that are empty (black) can also be selected. These destination ports will be surrounded by a green circle.
  • Empty ports (black) in the origin container or occupied ports (green) in the destination container can not be selected.
  • The origin and destination ports are also displayed in the Sample Move List. Each port is added to the Sample Move List in the order selected. For example, pairs can be added to the list by clicking between the origin and destination containers or all the origin ports can be added first and then the destination ports can be added.
  • The origin and destination container can be the same one (ie, the interface can be used to change the position of the samples in the same cassette). Also, the destination ports can be distributed amongst different containers.
  • A line can be removed from the Sample Move List by clicking on it and subsequently clicking on the Remove button. The entire list can be removed by clicking on the Clear List button.

Once all the samples and their destinations have been selected, the sorting takes place by pressing the Start button. It takes about 20 - 25 minutes to move all the samples in one cassette.

  • Sorting can not be initiated if a sample is currently mounted on the goniometer.
  • You must be the owner of the containers specified in the Sample Move list.
  • Once the robot starts the sample sorting process, it will not be possible to make any further changes to the Sample Move List.
  • If the robot encounters a problem during sorting (e.g. an empty origin port, a port jam, an occupied destination port) the sorting operation will be aborted.