An east-to-build version of simtbx, i.e. nanoBragg and diffBragg wrappers for python.
This has been tested on Debian 12 (bookworm), SUSE 15.4, Redhat 8.6, and Sonoma 14.5 (Apple M1).
If working on a compute cluster, load all of your modules (e.g., module load cuda) before beginning installation.
wget https://github.com/conda-forge/miniforge/releases/latest/download/Miniforge3-Linux-x86_64.sh
bash ./Miniforge3-Linux-x86_64.sh -b -u -p $PWD/simforge
source simforge/etc/profile.d/conda.sh wget https://github.com/conda-forge/miniforge/releases/latest/download/Miniforge3-MacOSX-arm64.sh
bash ./Miniforge3-MacOSX-arm64.sh -b -u -p $PWD/simforge
source simforge/etc/profile.d/conda.sh Note there is also an x86_64 version of mamba that can be installed on macs. If you use this on arm64 macs (M1 etc.), then you will need to set a special cmake flag (see below).
wget https://github.com/conda-forge/miniforge/releases/latest/download/Miniforge3-Linux-ppc64le.sh
bash ./Miniforge3-Linux-ppc64le.sh -b -u -p $PWD/simforge
source simforge/etc/profile.d/conda.shNote, after creating the simtbx environment below, use conda activate simtbx to activate it, despite the message that says to use mamba activate simtbx.
The environment is fully supported by conda, so simply install:
mamba create -n simtbx -c conda-forge cctbx-base libboost-devel libboost-python-devel dxtbx python=3.9 -y
conda activate simtbxThese instructions were tested on the Summit cluster. There is no dxtbx conda package for ppc64 (yet), so you will need to build dxtbx manually. Fortunately, ppc64 conda packages of cctbx-base and boost exist, so begin by getting those:
mamba create -n simtbx -c conda-forge cctbx-base libboost-devel libboost-python-devel python=3.9 -y
conda activate simtbx
Then, bring in dependencies needed for dxtbx (including a downgrade of numpy):
mamba install -c conda-forge pybind11 hdf5 h5py cython numpy==1.26
pip install orderedset natsort
wget  https://pypi.io/packages/source/p/pycbf/pycbf-0.9.6.5.tar.gz
tar -xzvf pycbf-0.9.6.5.tar.gz
cd pycbf-0.9.6.5
python setup.py build
python setup.py install
cd ..
Finally clone dxtbx, and install using cmake. You might need to define a few more cmake hints to help cmake find the correct python etc.
git clone https://github.com/cctbx/dxtbx.git
cd dxtbx
# mamba install cmake if you dont have it
HDF5_ROOT=$CONDA_PREFIX cmake -B build .
(cd build && make -j4 && make install)
python setup.py install
cd ..This build uses cmake and the poorly named python build module. If cmake is not already in your path, simply install it with mamba (it can also be installed with homebrew if using a Mac):
mamba install cmakeFor the python build module, grab it with pip:
pip install buildFor building the CUDA wrappers, set up the typical CUDA env, and ensure nvcc is in your path:
typical_cuda_setup.sh
export CUDA_HOME=/usr/local/cuda/
export CUDA_PATH=$CUDA_HOME
export PATH=$PATH:${CUDA_HOME}/bin
export LD_LIBRARY_PATH=${CUDA_HOME}/lib64Get the easyBragg sources and install:
# clone
git clone --recurse-submodules https://github.com/pixel-modelers/easyBragg.git
cd easyBragg

# compile/link
cmake -B build_ext .
make -C build_ext -j4 install

# install python bits
python -m build
pip install dist/simtbx-0.1.tar.gz

# alternatively, an edit-in-place dev build:
# pip install -e .
The make install command will copy the extension modules to easyBragg/ext as well as $CONDA_PREFIX/lib/python*/site-packages/.
Note, at each fresh login one should activate the simtbx env. For that, create an env script:
setup_ezbragg.sh
# if done prior to install, add module loads here, e.g.
# module load cuda/12.0

SIMFORGE=/path/to/simforge
source $SIMFORGE/etc/profile.d/conda.sh
conda activate simtbx
Hence, at login run source /path/to/setup_ezbragg.sh.
1. If dependency resolution is slow (this is more likely to happen when using conda as opposed to mamba), try installing in steps:
conda create -n conda-forge::cctbx-base python=3.9 -y
conda install conda-forge::dxtbx -y
2. To use the cctbx/boost headers provided as a submodule in this repo as oppposed to conda-installing the libboost-devel and libboost-python-devel packages, then one only needs the conda packages cctbx-base and dxtbx. Then, at the cmake step, do
cmake -DSIMTBX_BOOST=$PWD/../simtbx_boost ..Note, the simtbx_boost submodule is currently linked to version 1.84.
3. If using the x86_64 conda packages on an arm64 mac, try:
cmake -DCMAKE_OSX_ARCHITECTURES=x86_64 ..4. For non-standard CUDA install locations, use:
cmake -DCUDAToolkit_ROOT=/path/to/some/cuda ..5. To skip the CUDA install, despite cmake finding CUDAToolkit, define NOCUDA:
cmake -DNOCUDA=1 ..6. To uninstall, use
pip uninstall simtbxNote, after uninstalling, the two extension modules simtbx_nanoBragg_ext.so and simtbx_diffBragg_ext.so will remain in python site-packages. Repeating the cmake build recipe will simply over-write them .
7. Install CUDAToolkit with conda
To biuld against conda cuda-toolkit packages, try
mamba install nvidia::cudatoolkitand then run cmake. This may or may not work depending on the installed GPU.
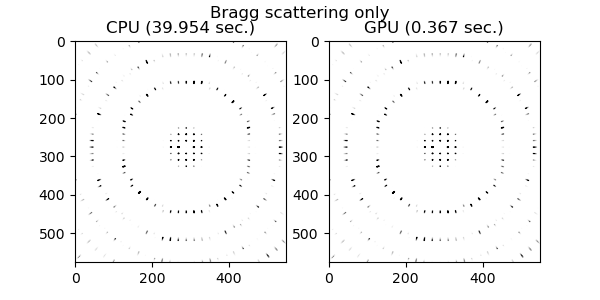
Try python example.py to display a simulated pattern:
If you ran cmake in a CUDA environment, then you will see an additional image displayed, showing the CPU and GPU kernel results are identical, but the GPU kernel runs faster (~100x, depending on the number of pixels, oversample-rate, number of mosaic domains, and number of sources):
Most of the nanoBragg and diffBragg tests can be run, for example:
python simtbx_project/simtbx/nanoBragg/tst_nanoBragg_cbf_write.py
python simtbx_project/simtbx/nanoBragg/tst_gauss_argchk.py GPU
python simtbx_project/simtbx/diffBragg/tests/tst_diffBragg_hopper_refine.pyUnless you are on a PPC64 machine, dials can also be brought in with mamba:
mamba install conda-forge::dialsA Python script for simulating a laue pattern can be found here. Grab the script, along with some meta data:
wget https://gist.githubusercontent.com/dermen/c727f87d768c3cb428d1a39abbe6edbb/raw/36700b3013f9caa3130563f03fa3c2b67ff240c8/sim_laue_basic.py
wget https://raw.githubusercontent.com/dermen/e080_laue/master/air.stol
wget https://raw.githubusercontent.com/dermen/e080_laue/master/from_vukica.lam
iotbx.fetch_pdb 7lvc
Then test the script with the simtbx env active:
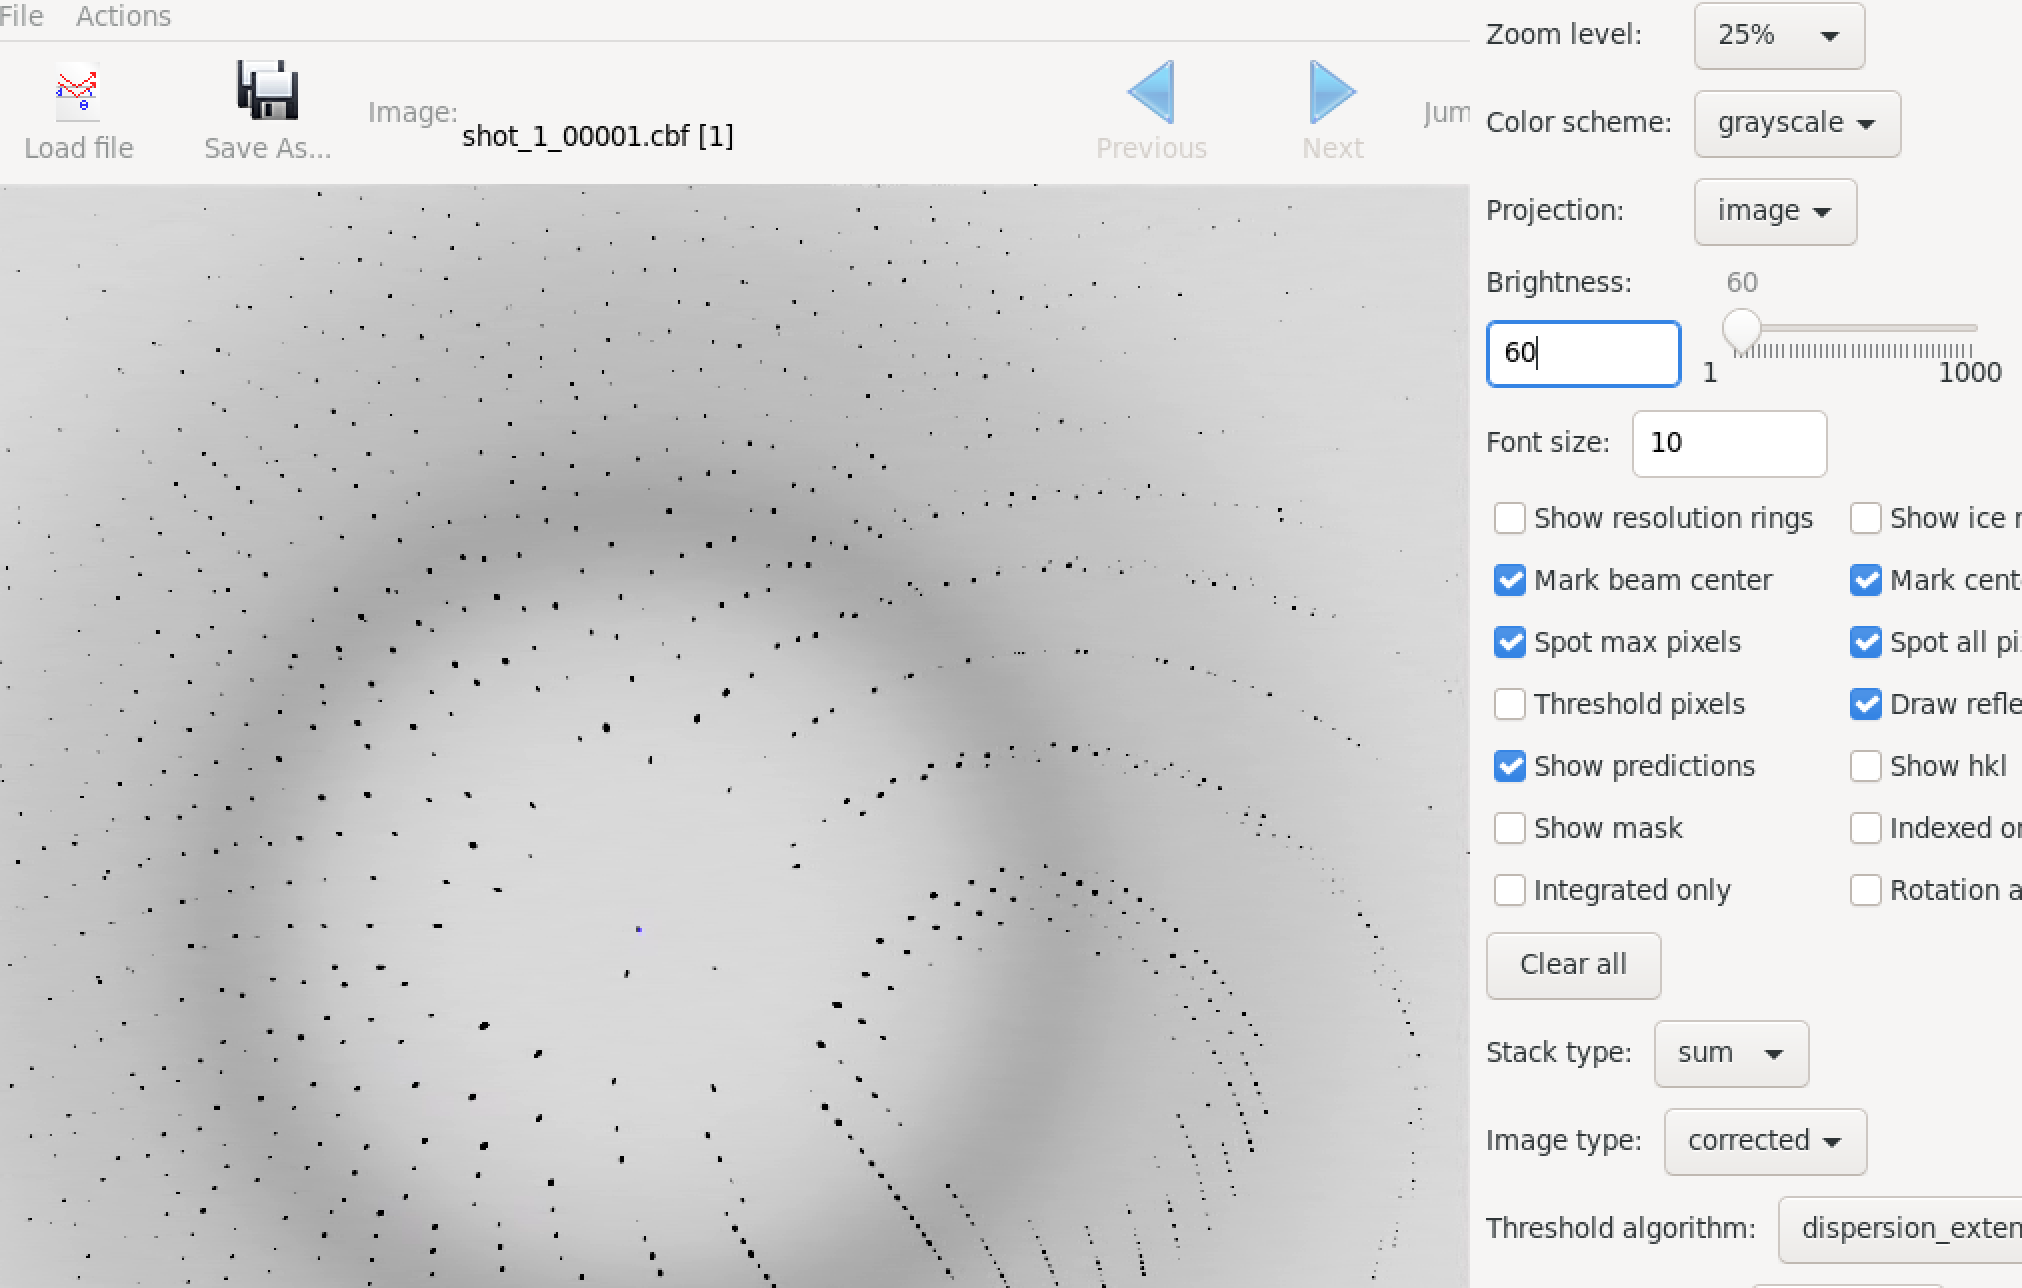
python sim_laue_basic.py test_laue --numimg 1 --cuda --mosDoms 1 --mosSpread 0The image can be viewed using DIALS or ADXV:
mamba install conda-forge::dials
dials.image_viewer test_laue/shot_1_00001.cbf