Room Temperature Xenon High Pressure Cell
Description of Room Temperature Pressure Cell

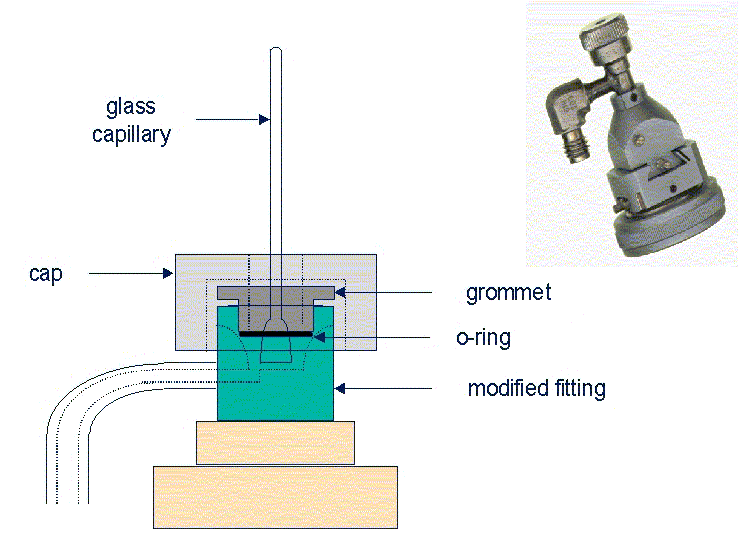
A complete system, developed for the study of samples under gas pressures of up to ~200 PSI, is available at beamline 7-1 for the safe and easy production of xenon derivatives at room temperature. Standard X-ray capillaries are used to mount the sample and diffraction data are collected while the sample is pressurized. This system employs a sample mounting system, a control unit, and an integrated safety shield.
Directions for Use of SSRL Xenon Pressure Cell
Prior to Use:
- Safety glasses must be worn in the hutch at ALL times.
- Verify that both safety signs (one inside and one outside the hutch) are posted in plain view.
Operation:
- Install safety shield on MAR scanner PHI axis box. Ensure that it is secured.
- Select "VENT" on the control unit.
- Turn on the control unit with key switch.
- Check to ensure that interlocks are complete (LED). If the interlock light (I/LOCK) is not lit, check that
the safety shield is properly mounted on the MAR scanner (there are two micro-switches under the shield box, they must make contact with the MAR).
- The sample should be mounted in a glass or quartz capillary at least 1.3" from the base. If less than 1.3"
the pressure cell will collide with the MAR slit assembly.
- A small sliver of wet filter paper can be placed inside the lip of the capillary to prevent the sample from
drying out. Be careful not to obstruct flow to the crystal.
- Mount the capillary in the ultra-torr fitting which should be secured to the Huber goniometer head. The o-ring should be clean of all particulates. The cell seals when the cap is finger tight.
- The cell should only be pressurized after it has been mounted on the PHI axis.
- Mount the pressure cell on the phi axis.
- Insure that full rotation of the pressure cell on the PHI axis will not result in a collision with the MAR
slit assembly.
- The regulator valve on the control unit is preset to ~200 PSI and should not be adjusted.
- Open the valve on the Xe bottle directly underneath the control unit.
- Select "FILL" then return the VENT/FILL switch to the neutral position.
- Let the sample equilibrate for ~20 minutes
- Recenter the sample before collecting data.
- When data collection is complete, select 'VENT'.
- Check both the pressure indicator light and the digital display before removing the pressure cell from the PHI
axis. Do not remove the cell while it is pressurized.
- Reattach goniometer head to safety shield base.
- Remove sample.
Shutdown:
- Verify that the xenon tank valve is closed.
- Verify that 'VENT' is selected.
- Turn the control unit off.
- Make sure the Huber goniometer head is firmly attached to the safety shield base.
- Verify that the pressure cell is firmly attached to the Huber goniometer head.
- Remove all material and filter paper from the pressure cell.
- Remove the safety shield and set on top of the control unit.
Report any problems with the system.
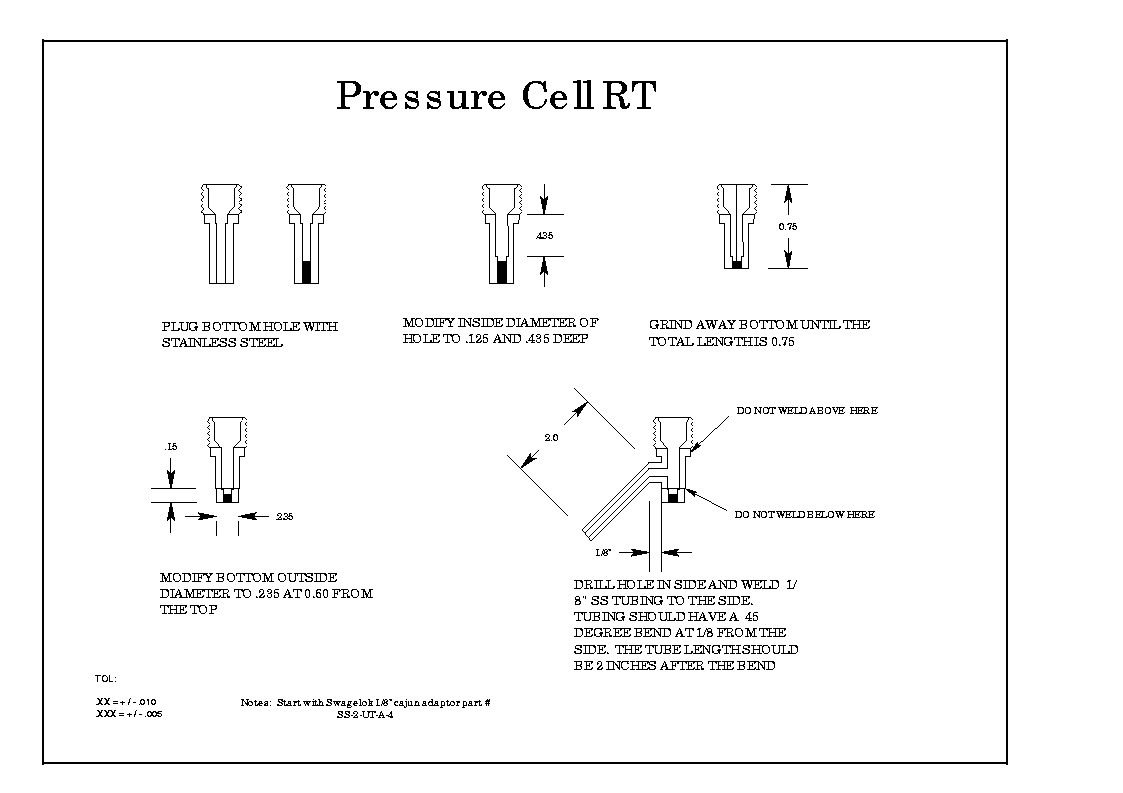
Schematics of the SSRL Xenon Pressure Cell

|


